— Mr. Badger —
A 3D-Cookie Figurine
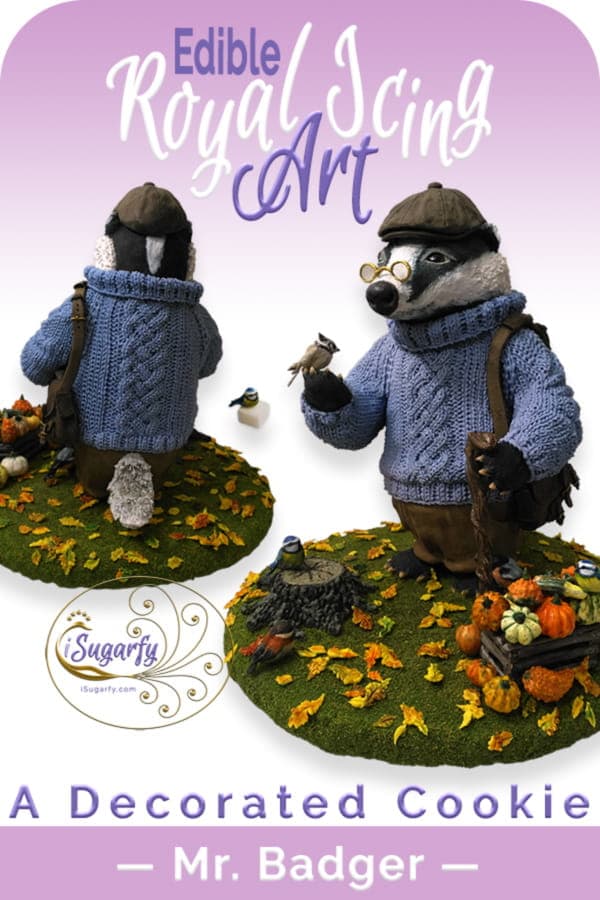
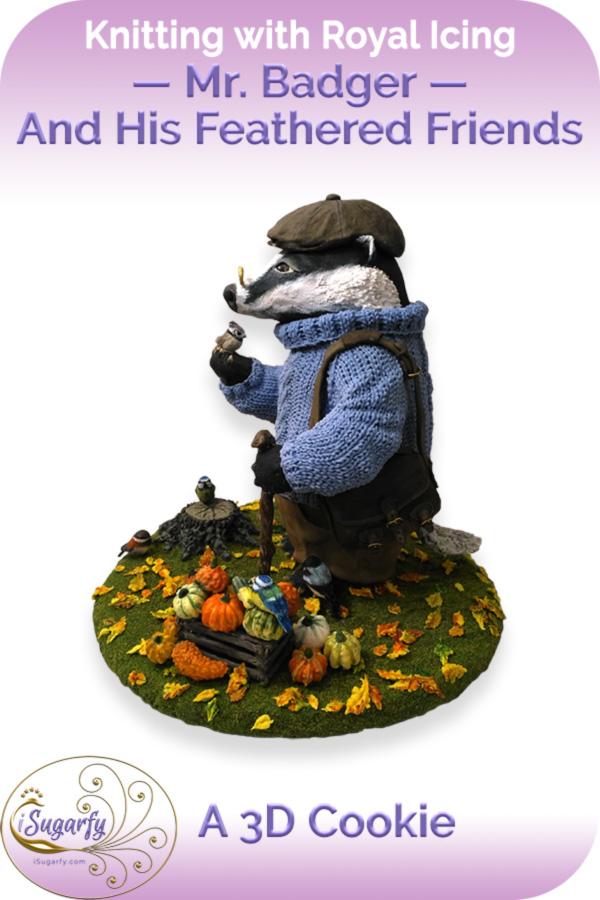
Mr. Badger stands 17 cm tall. His body was created with 5 separate pieces of molded and modeled gingerbread (the main body and heads are hollow), and further modeled with very stiff royal icing, and then over piped.
The pince-nez glasses on Mr. Badger's nose are made of Isomalt. His feathered friends, the leather briefcase, hat, tree stump, gourds and pumpkins are modeled and over piped with RI as well, then hand painted.
Click on any image to enter the gallery mode.
Mr. Badger's Body
For the body, incl. head and legs, I formed a basic shape with aluminum foil and then baked the cookie on this much like is done with spheres or eggs in the cookier world.
Mr. Badger's arms are
modeled, and his feet are a heart cookie with shortened tip. I used
stiff icing to model the more detailed body features and over piped them with the
finer details.
Mr. Badger's Sweater
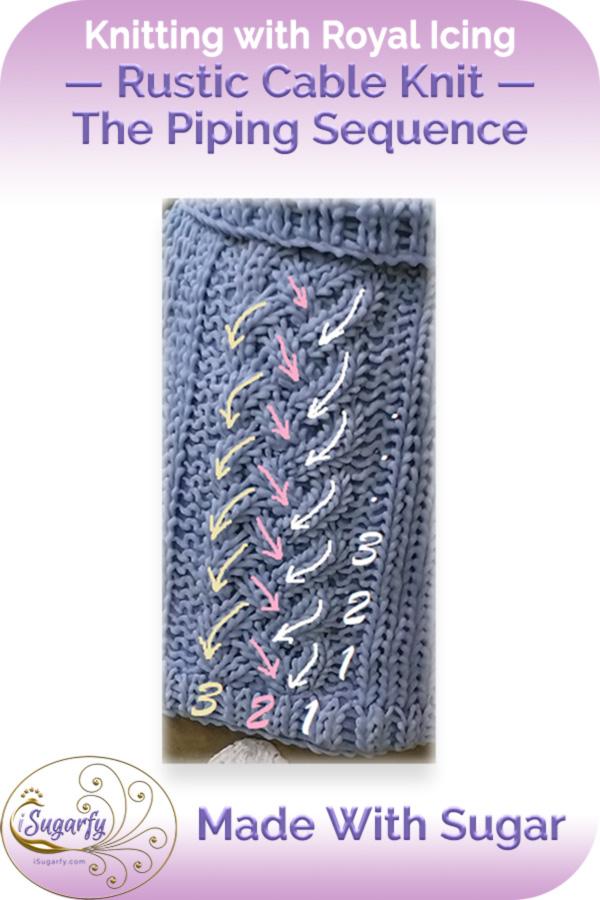
I started with the cable knit pattern, as it was the most complicated to pipe. There are three main vertical columns to it: the outer two (marked with white and yellow arrows) consisting of curved segments, and the middle one (marked with pink arrows) consisting of shorter straight segments.
The columns were piped from bottom to top, and from right to left. However, the individual segments within each column were piped from top to bottom, as indicated by the direction of the arrows.
In other words, I started at the bottom right and piped one segment at a time, in this order (referring to the numbers above): 1-1 (row-column), 1-2, 1-3, 2-1, 2-2, 2-3, 3-1, 3-2, 3-3, and so on, all the way to the top. I did it this way, so that each segment would overlap the segment beneath it.
— Tips & Tricks —
For the knitting technique one uses stiff-consistency icing, so that the stitches remain as distinct as possible.
And it only can be piped with parchment paper cones, as metal tips would be not only too rigid for this kind of work, but also too "thick-walled", i. e. paper is much thinner.
To measure a somewhat consistent opening, one sticks the scribe tool through the cut hole from the inside of each cone, and makes sure the protrusion of the scribe needle is always the same. In my case here it measured about 3 mm.
Piping and Assembly Progression
for Mr. Badger's Sweater
The piping and assembly progression for the whole sweater was as follows (see photo below):
- Cable knit in the front of the sweater;
- Left and right of cable knit;
- Underneath the arms on the body;
- The under part of the arms themselves, before they were glued to the body;
- Upper and outer sides of the arms once they were attached and sculpted to the body (right arm attached first);
- Back, same as the front, i.e., starting with the cable knit part;
- Left arm attached next, and piped as before; and
- Lastly, the bottom border and collar.

The most challenging part was to tie the stitches of the arms together with the stitches on the body. And yes, I had to stop many times to allow for drying, especially
because I was piping with Mr. Badger laying down on a cushioned
turntable. I only stood him up to allow him to dry and to take progress
photos.
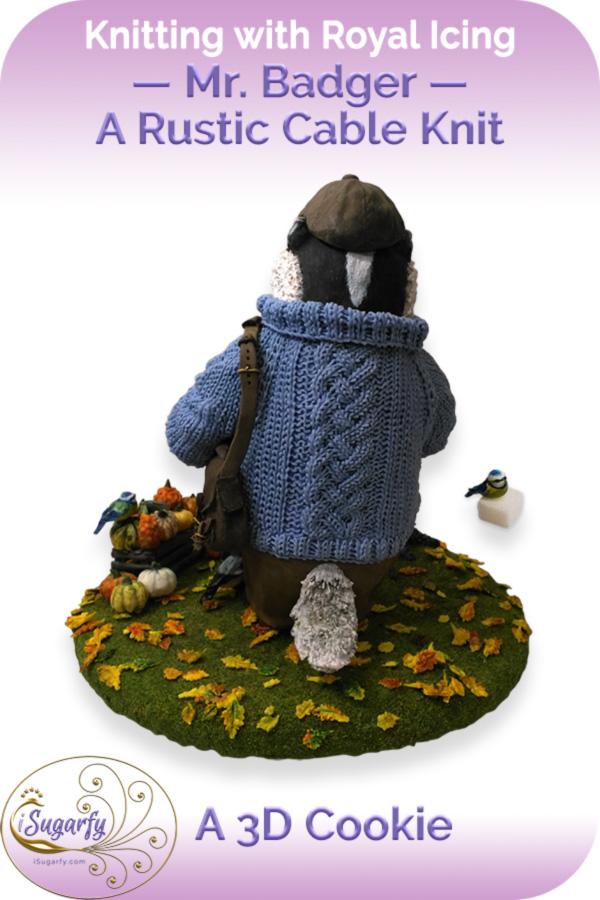
Here are a couple more images of Mr. Badger's back:
I hope I was able to inspire you to give the knitting technique a try. If you would like to learn the basic knit stitch, please watch my video How to Pipe the Basic Knit Stitch with Royal Icing.
The plan is to make another of these Wind-in-the-Willows characters, and then add many more progression pictures - not only that, but of course also make a video. If you'd like to be kept in the loop, please do sign up for my newsletter at the top right of this page on a desktop, or below on a mobile.
Want to keep me motivated to share sugar art tutorials and demos with you?
Yes?

Return HOME from Mr. Badger's page
Return to the Knitted Cookies page
Return to the Gallery

Don't worry — your email address is secure with me. I promise to use it only to send you my iSugarfy News.


